Research is rarely limited to a single contributor performing a single role. Behind every research output are people contributing in various ways: software development, data analyses, methodology design, and much more. Often, the same person contributes in several of these ways. Until now, Crossref metadata could only capture part of that picture, and this is changing now.
Through user experience research (UXR) initiatives that take into account our diverse membership and community, we can have a continuous, deeper understanding of the role of metadata in our members’ workflows, and ensure that our work continues to meet our community’s needs. Your support is the key to this process, and will positively impact the wider community - and if you’d like to start today, you can take part in our latest initiative: help us improve our Events page by sharing your thoughts on the page’s feedback form.
Our 2026 Community Update took place on 13 May. Two calls, one for the eastern and one for the western time zone, highlighted how our global community is growing, how we’re refining the metadata that supports trust in the scholarly record, and connecting records more effectively through our latest tools.
Funding is one of the key enablers of the research lifecycle, but has been one of the hardest parts of the scholarly record to identify, describe and connect. This is slowly changing as we have recently reached a very exciting milestone for Crossref’s Grant Linking System (GLS). What makes it remarkable is not only the numbers reached, but where the data comes from. Research funders, who joined Crossref as members, have actively contributed more than 200,000 grants to the Research Nexus (Figure 1).
This section of our documentation is for Similarity Check account administrators who plan to access iThenticate 2.0 through their Manuscript Submission System (MTS).
Not sure if you’re using iThenticate v1 or iThenticate 2.0? More here.
Not sure whether you’re an account administrator? Find out here.
To set up your integration with your MTS, you need to create an API key by logging into iThenticate through the browser. You will then share this API key and the URL of your iThenticate 2.0 account with your MTS.
Please note: If you are sponsored by Biteca, please contact your sponsor who will help you with this.
Step One: Decide how many API scopes and API keys you need
Within iThenticate, you can set up different API Scopes, and within that, different API keys. Most members will just need one API Scope and one API key. However, some members may need more than one.
If you need to integrate with more than one Manuscript Tracking System (MTS), you will need a different API Scope for each MTS.
If you publish on behalf of societies or work with other organisations who want to keep their activities separate from each other, you will need a different API Scope and API key for each society.
If at some point in the future, you need to change your API key for an existing MTS integration, you must generate a new API key under the same scope that you originally used for this integration.
Step Two: Create your API Scope and API key(s)
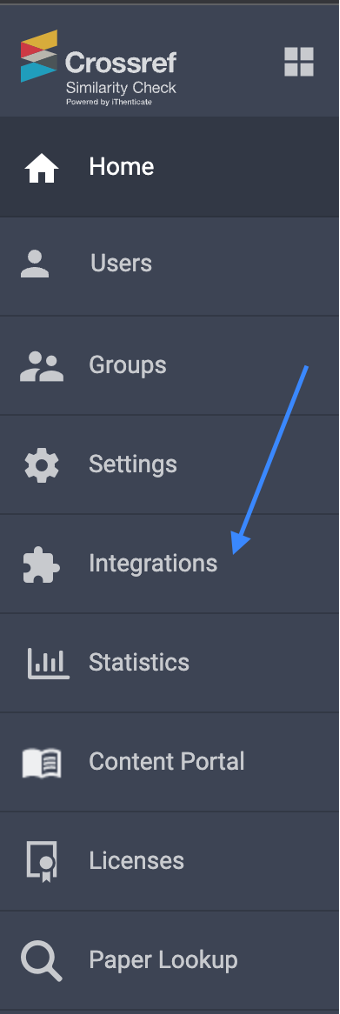
Click on “Integrations” in the menu.
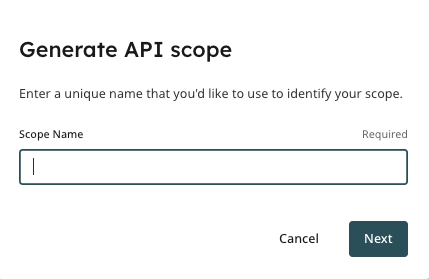
This will bring you to the Integrations section. Click on the “Generate API Scope” key.
You will then give your API Scope a name.
For example, this may be the name of a particular MTS, or of a particular society.
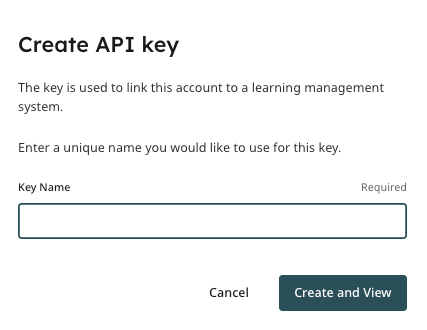
Under your new API Scope, you can then set up your first API key.
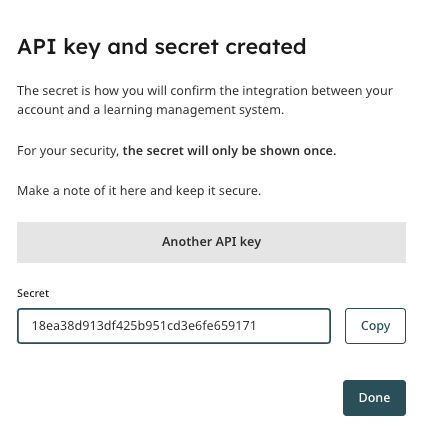
Once you add the key name, you will be able to click on the “Create and view” button. The system will then generate your key.
Step three: Add your API key into your Manuscript Tracking System (MTS)
In order to integrate your new iThenticate 2.0 account and your Manuscript Tracking system(s), your MTS will require from you:
At least one API key
Your unique iThenticate URL containing your Crossref membership number using the following format: https://crossref-xxx.turnitin.com. (For example, if your Crossref Membership number is 1234, your URL will be: https://crossref-1234.turnitin.com. If you are not sure what your Crossref Membership number is, please ask us.
Follow the instructions below for the relevant MTS:
OJS
Follow the instructions found on PKP’s website. You’ll need to ensure that you’re on OJS version 3.3, 3.4, or 3.5. For instructions on how to upgrade your OJS instance, please visit PKP’s documentation here or here, depending on which version you’re currently running.
Editorial Manager
Enter your iThenticate API key(s) and your iThenticate 2.0 account URL into the iThenticate configuration page in Editorial Manager. There are instructions available from Aries Systems here.
eJournal Press
Email your API key(s) and your iThenticate 2.0 account URL to support@ejpress.com and the team at eJournal Press will set up the integration for you.
ScholarOne
If you are already using iThenticate with ScholarOne and are upgrading from iThenticate v1 to iThenticate 2.0, please email your API key(s) and your iThenticate 2.0 account URL to s1help@clarivate.com, and the team at ScholarOne will make the change for you. Please put “Product Management” in the subject line of your email.
If you are a new subscriber to Similarity Check and you haven’t used iThenticate before, you don’t need to email the team at ScholarOne. Just enter your iThenticate API key(s) and your iThenticate 2.0 account URL into the iThenticate configuration page in ScholarOne.
Scholastica
The team at Scholastica will set up the integration for you. Give them your API key(s) and your iThenticate 2.0 account URL by filling out this form.
The team at Scholastica will also set up any exclusions for you, so in the form they’ll ask you which sort of content you want to exclude from displaying as a match.
Page maintainer: Kathleen Luschek Last updated: 2022-July-18