Research is rarely limited to a single contributor performing a single role. Behind every research output are people contributing in various ways: software development, data analyses, methodology design, and much more. Often, the same person contributes in several of these ways. Until now, Crossref metadata could only capture part of that picture, but this is changing with Schema 5.5.
Through user experience research (UXR) initiatives that take into account our diverse membership and community, we can have a continuous, deeper understanding of the role of metadata in our members’ workflows, and ensure that our work continues to meet our community’s needs. Your support is the key to this process, and will positively impact the wider community - and if you’d like to start today, you can take part in our latest initiative: help us improve our Events page by sharing your thoughts on the page’s feedback form.
Our 2026 Community Update took place on 13 May. Two calls, one for the eastern and one for the western time zone, highlighted how our global community is growing, how we’re refining the metadata that supports trust in the scholarly record, and connecting records more effectively through our latest tools.
Funding is one of the key enablers of the research lifecycle, but has been one of the hardest parts of the scholarly record to identify, describe and connect. This is slowly changing as we have recently reached a very exciting milestone for Crossref’s Grant Linking System (GLS). What makes it remarkable is not only the numbers reached, but where the data comes from. Research funders, who joined Crossref as members, have actively contributed more than 200,000 grants to the Research Nexus (Figure 1).
To work out which version you’re on, take a look at the website address that you use to access iThenticate. If you go to ithenticate.com then you are using v1. If you use a bespoke URL, https://crossref-[your member ID].turnitin.com/ then you are using iThenticate 2.0.
v1 Creating and finding your Similarity Report, keep reading:
For each document you submit for checking, the Similarity Report provides an overall similarity breakdown. This is displayed in the form of percentage of similarity between the document and existing published content in the iThenticate database. iThenticate’s repositories include the published content provided by Crossref members, plus billions of web pages (both current and archived content), work that has previously been submitted to Turnitin, and a collection of works including thousands of periodicals, journals, publications.
Matches are highlighted, and the best matches are listed in the report sidebar. Other matches are called underlying sources, and these are listed in the content tracking mode. Learn more about the different viewing modes (Similarity Report mode, Content tracking mode, Summary report mode, Largest matches mode).
If two sources have exactly the same amount of matching text, the best match depends on which content repository contains the source of the match. For example, for two identical internet source matches, the most recently crawled internet source would be the best match. If an identical match is found to an internet source and a publication source, the publication source would be the best match.
Accessing the Similarity Report (v1)
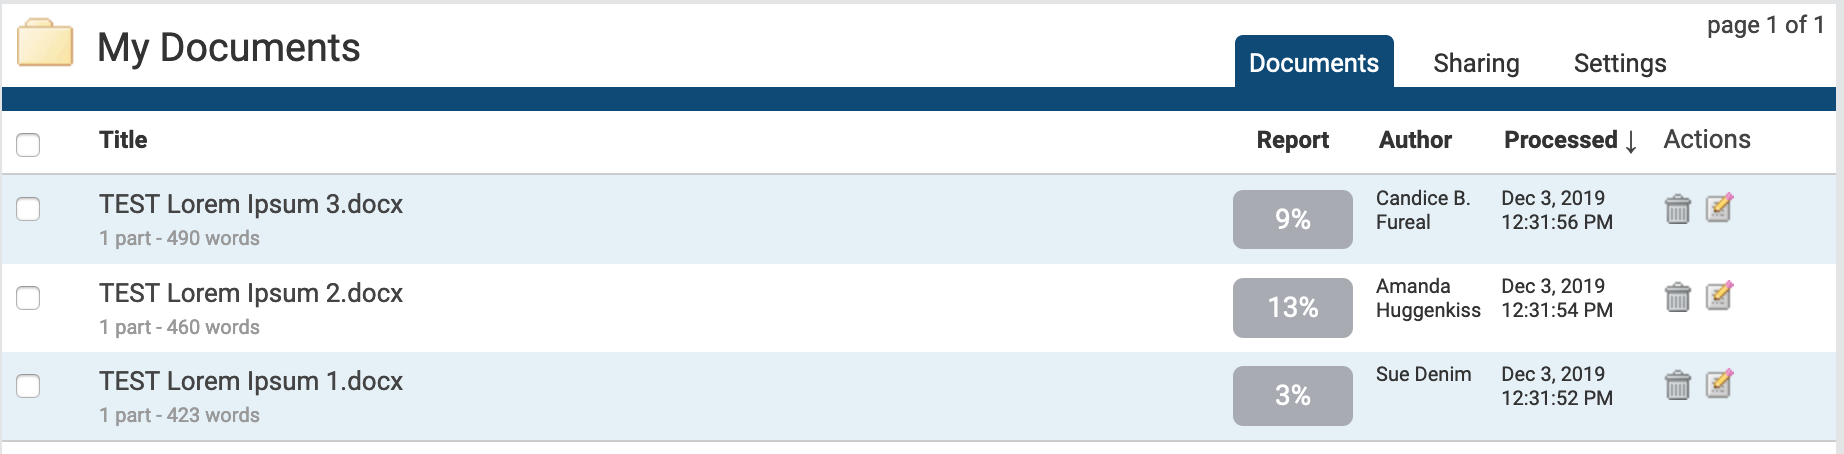
To access the Similarity Report through iThenticate, start from the folder that contains the submission, and go to the Documents tab. In the Report column, you will see a button - click this Similarity Score to open the document in the Document Viewer.
The Document Viewer (v1)
The Document Viewer screen opens in the last used viewing mode. There are three sections:
Along the top of the screen, the document information bar shows details about the submitted document. This includes the document title, the date the report was processed, the word count and the number of matching sources found in the selected databases.
The left panel is the document text. This shows the full text of the submitted document, highlighting areas of overlap with existing published content.
The colors correspond to the matching sources, listed in the sources panel on the right.
The layout will depend on your chosen report mode:
Match Overview (show highest matches together) shows the best matches between the submitted document and content from the selected search repositories. Matches are color-coded and listed from highest to lowest percentage of matching word area. Only the top or best matches are shown - you can see all other matches in the Match Breakdown and All Sources modes.
All Sources shows matches between the submission and a specifically selected source from the content repositories. This is the full list of all matches found, not just the top matches per area of similarity, including those not seen in the Match Overview because they are the same or similar to other areas which are better matches.
Match Breakdown shows all matches, including those that are hidden by a top source and therefore don’t appear in Match Overview. To see the underlying sources, hover over a match, and click the arrow icon. Select a source to highlight the matching text in the submitted document. Click the back arrow next to Match Breakdown to return to Match Overview mode.
Side-By-Side Comparison is an in-depth view that shows a document’s match compared side-by-side with the original source from the content repositories. From the All Sources view, choose a source from the sources panel, and a source box highlights on the submitted document similar content within a snippet of the text from the repository source. In Match Overview, select the colored number at the start of the highlighted text to open this source box. To see the entire repository source, click Full Source View, which opens the full-text of the repository source in the sources panel and all the matching instances. The sidebar shows the source’s full text with each match to the document highlighted in red. Click the X icon in the top right corner of the full source text panel to close it.
Use the view mode icons to switch between the Match Overview (default, left icon) and All Sources Similarity Report viewing modes. Click the right icon to change the Similarity Report view mode to All Sources.
Viewing live web pages for a source (v1)
You may access web-based sources by clicking on the source title/URL. If there are multiple matches to this source, use the arrow icons to quickly navigate through them.
If a source is restricted or paywalled (for example, subscription-based academic resources), you won’t be able to view the full-text of the source, but you’ll still see the source box snippet for context. Some internet sources may no longer be live.
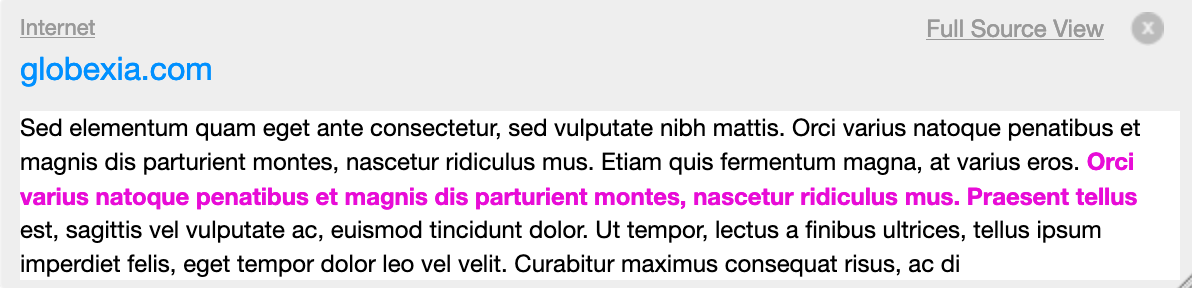
From Match Overview, click the colored number at the start of a piece of highlighted text on the submitted document. A source box will appear on the document text showing the similar content highlighted within a snippet of the text from the repository source. The source website will be in blue above the source snippet - click the link to access it.
From Match Breakdown or All Sources, select the source for which you want to view the website, and a diagonal icon will appear to the right of the source. Click this to access it.
Page maintainer: Kathleen Luschek Last updated: 2020-May-19